Case Study: A Raspberry Pi Controller for a Four-Tower Hydroponic Garden
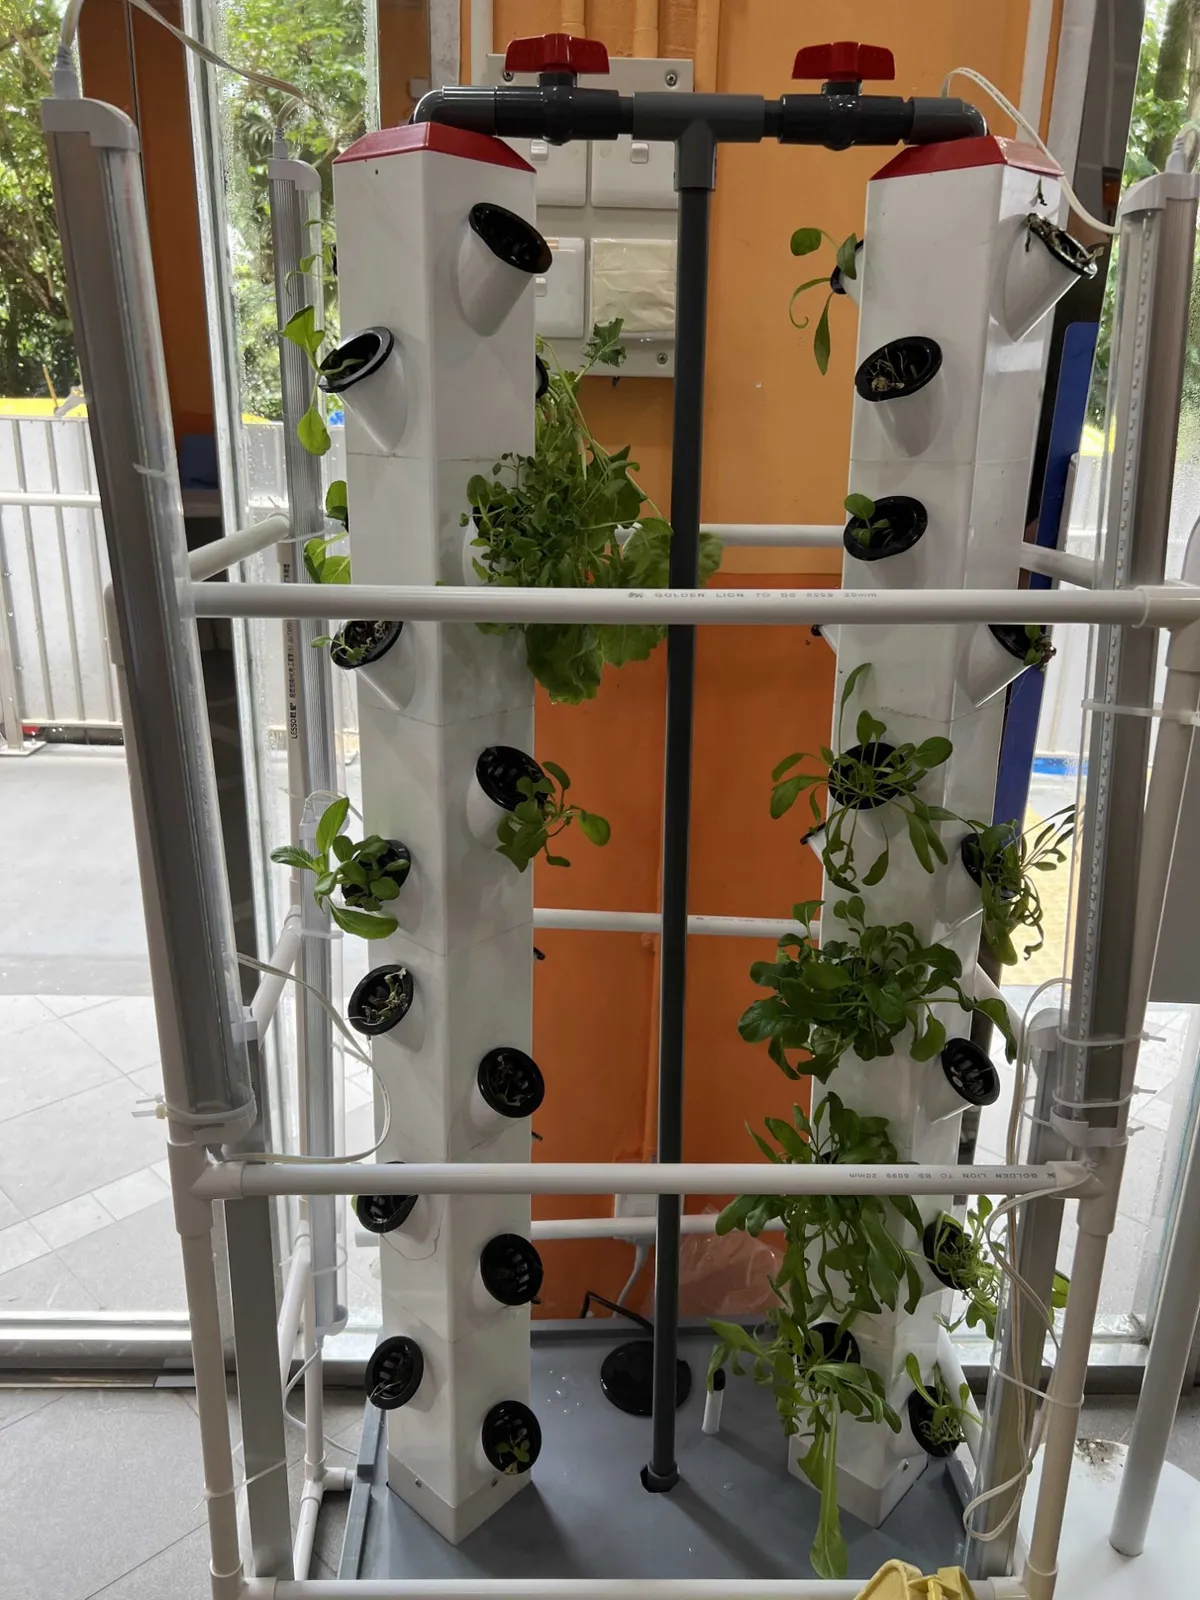
We built a Raspberry Pi controller for a four-tower vertical hydroponic garden for a Hong Kong-based client. A Raspberry Pi 3 reads humidity, temperature, light and pH/EC sensors, switches the water pumps, solenoid valves and grow lights, and serves a web dashboard over Wi-Fi. The dashboard shows the data, and an administrator can take manual control of every output.


The Challenge
The client had a vertical hydroponic rig with four towers and wanted it to look after itself. Water, light and nutrient conditions all need watching, and doing that by hand means checking the plants every day. The brief was to build the control system around a Raspberry Pi and a set of sensors, with a way to see what was happening and step in when needed.
The details are what make it hard. Natural light changes through the day, so a fixed lighting schedule wastes power or starves the plants. pH and EC probes give analog signals that a Raspberry Pi cannot read on its own. And a system that only runs automatically is no use the moment someone needs to override it.
Technical constraints
- Raspberry Pi 3: Wi-Fi onboard, but no analog inputs for the pH and EC probes
- Four towers: pumps, solenoid valves and grow lights all to be controlled from one board
- Changing daylight: lighting had to respond to real conditions, not a clock
- Remote access over Wi-Fi: the dashboard and the manual controls share the same link
The System at a Glance
The Engineering
The controller is built around one decision: keep the sensing, the control logic and the dashboard on a single Raspberry Pi 3, and let it run the garden on its own with a person able to override it at any point.
Sensing, with an ADC for the probes
- The garden is read through humidity, temperature, light and pH/EC measurements
- The pH and EC probes output analog voltages, and the Pi 3 has no analog inputs
- An analog-to-digital converter sits between the probes and the Pi and hands it digital readings
- pH and EC are displayed on the dashboard so nutrient conditions can be watched, and they do not trigger any action on their own
Not readable on the Pi's GPIO pins
Read, shown and logged by the Pi
Lighting that follows the light, not the clock
- The grow lights run automatically from a lumen sensor
- The controller responds to the light the plants actually receive, including daylight that changes through the day
- A fixed timer would switch the lights on whether or not they were needed
We chose a sensor over a schedule because the garden sits in a space with natural light, and a closed loop adapts to that without anyone adjusting timings.
Ignores the light already present
Lights respond to real conditions
Pumps and valves on a schedule and on readings
- The water pumps and solenoid valves are switched by the Pi
- They run on a mix of schedule and sensor readings, so watering follows the garden's conditions and does not depend on a timer alone
- All four towers are controlled from the same board
Keeping the control logic on the Pi itself means the garden keeps running its routine even when nobody is looking at the dashboard.
A Wi-Fi dashboard with manual override
- The Pi serves a web dashboard over Wi-Fi with live readings from every sensor
- An administrator can take manual control of the lights, the pumps and the solenoid valves
- The automatic logic does the routine work, and a person can step in at any time
We chose the Pi 3 for this because Wi-Fi is built in and it runs Linux, so one board handles sensing, control and the web interface. It is the same single-controller approach we bring to Raspberry Pi development for connected devices.
Wi-FiWeb dashboardManual overrideA fault means a visit to the garden
Lights, pumps and valves from the dashboard
Tech Stack
| Layer | What we used | Why |
|---|---|---|
| Controller | Raspberry Pi 3 | Wi-Fi onboard, and Linux runs the control logic and the web server together |
| Analog inputs | Analog-to-digital converter | The Pi 3 has no analog inputs, and the pH and EC probes output analog voltages |
| Sensors | Humidity and temperature, light (lumen), pH and EC | Climate and light drive the automatic control, and pH and EC are monitored on the dashboard |
| Outputs | Water pumps, solenoid valves, grow lights | Everything the garden needs to run, switched from one board |
| Interface | Web dashboard over Wi-Fi | Live readings, and administrator manual control of all three outputs |
Production Reality
We want to be precise about what this is. It was a one-off build delivered to a single client, not a production batch. It shows the approach working on a real four-tower rig, but it does not come with a batch run, a custom board or traceability across units.
Taking a design like this to volume means a custom board, an enclosure and a test routine for each unit. The control logic and the dashboard approach carry over unchanged.
The Outcome
The client's garden runs from the Raspberry Pi, with plants growing in the towers. They can watch conditions from the dashboard and take over the lights, pumps and valves by hand whenever they need to.

What This Proves
This is a small version of the architecture we use in larger agriculture systems: a central controller reads field sensors, switches the actuators from those readings, and reports to a dashboard. The scale changes and the design does not. It sits within our agritech development company work and our wider IoT development practice.
Frequently Asked Questions
Why use a Raspberry Pi for a hydroponic controller?
The Raspberry Pi 3 has Wi-Fi built in and runs Linux, so sensor reading, control logic and a web dashboard can all run on one small board. The trade-off is that it has no analog inputs, which is why this build adds an analog-to-digital converter for the pH and EC probes.
Why do pH and EC probes need a converter on a Raspberry Pi?
pH and EC probes output analog voltages, and the Pi's GPIO pins only read digital signals. An analog-to-digital converter samples the probe voltage and passes the Pi a digital value it can read, log and show on a dashboard.
Why run grow lights from a lumen sensor instead of a timer?
A timer switches the lights at fixed hours whether or not the plants need them. A lumen sensor measures the light that actually reaches the plants, so the controller responds to real conditions, including daylight that changes through the day.
Can an administrator override the automatic control?
Yes. In this build the dashboard shows live readings and also lets an administrator control the lights, the water pumps and the solenoid valves by hand. The automatic logic handles the routine work, and a person can step in at any time.
Can a one-off build like this become a product?
A one-off client build is not a product by itself. Moving to production means a custom board in place of a prototype wiring setup, an enclosure and a test routine for each unit. This project was a one-off build for a single client.
Planning a Hydroponic or Indoor Growing System?
Tell us what you want to automate and we will tell you plainly how it would be built.