Case Study: A Raspberry Pi Interactive Exhibition Installation
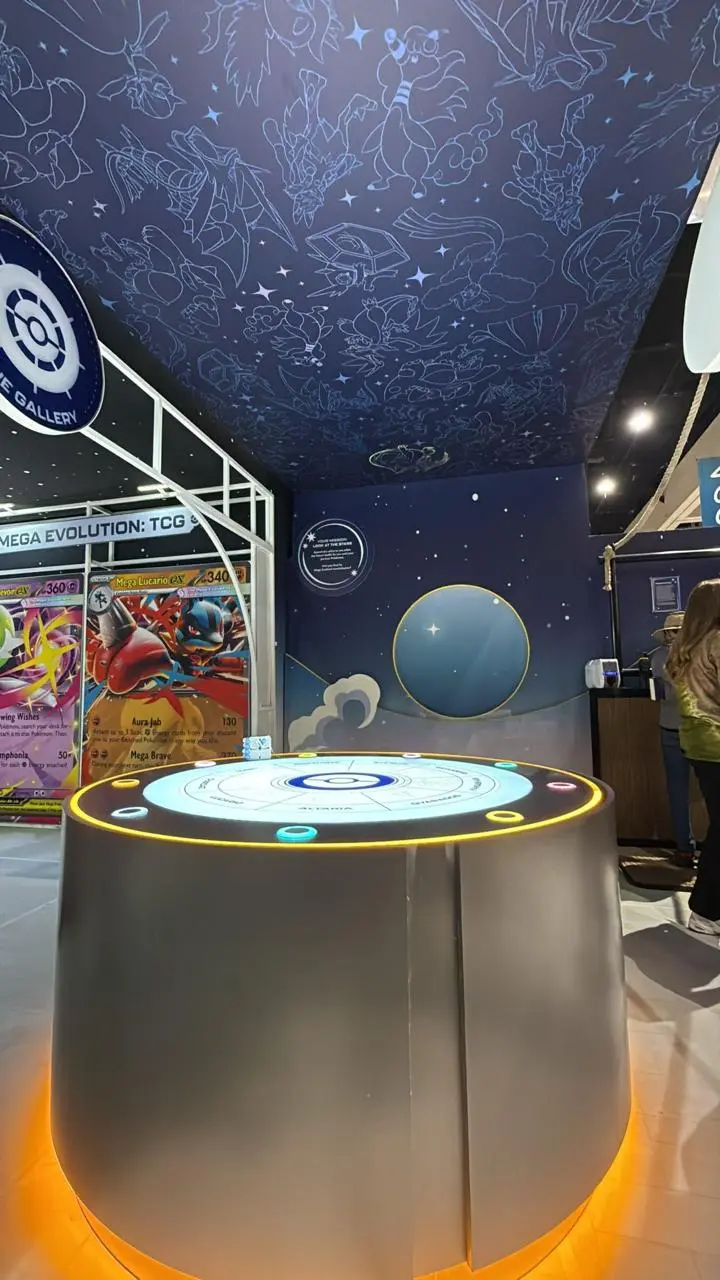
Exhibition floors are a hostile place for electronics. The device has to run for eight or ten hours without a technician standing next to it, absorb constant use from people who have no instructions and no patience, and do something interesting enough that a passer-by stops walking. DigitalMonk built exactly that kind of piece: a central pedestal ringed with illuminated buttons where a single press triggers a matching overhead panel to light up, paired with a synchronized sound effect. It is a simple idea from the visitor's side — press a button, get a reaction — and a deceptively involved one underneath, because "press a button, get a reaction" has to be true a few thousand times a day without a hiccup.
This is the kind of custom interactive exhibition installation development that off-the-shelf hardware can't deliver. The value isn't a screen or a speaker anyone can buy; it's the control system that ties a specific input to a specific light-and-sound response, reliably, on a live show floor. Below is how we engineered it.


The client's challenge
Our client, Hector, was building a walk-up attraction for an exhibition stand — a physical centerpiece meant to draw a crowd and give visitors something to do rather than just look at. The concept was clear: a pedestal a group could gather around, a ring of large buttons, and a payoff overhead when you pressed one. The engineering problem was everything the concept quietly assumed.
Standard event AV gear doesn't map arbitrary inputs to arbitrary outputs. A media player loops video; a sound board plays cues on a human's command; a lighting desk runs pre-programmed scenes. None of them natively say "when button 6 is pressed, illuminate panel 6 and play clip 6, right now, even if buttons 2 and 9 were pressed half a second ago." That choreography is bespoke logic, and bespoke logic needs a real controller and real firmware behind it.
There was also the unforgiving-environment problem. The installation would run unattended for the length of the show. It had to power on into a working state by itself, tolerate a crowd of kids pressing every button at once and holding them down, and never reach a state where a reboot was the only fix. Off-the-shelf wouldn't cut it — not because the parts don't exist, but because nothing off the shelf does this particular job in this particular order without a person babysitting it.
The engineering
We built the control system on a Raspberry Pi, chosen for a concrete reason rather than familiarity: a single Pi has enough GPIO to read the full ring of buttons, enough headroom to drive the button and panel lighting, and a real audio output — all on one board, with no microcontroller-to-host handshake to go wrong. For a standalone installation that has to boot itself and run alone all day, collapsing the whole stack onto one well-understood computer removes an entire category of failure. Fewer boards, fewer connectors, fewer things to come loose in transit and on site.
The buttons are addressable illuminated arcade buttons wired into a GPIO input matrix. Each press has to be read cleanly, which sounds trivial and isn't: mechanical buttons bounce, generating a burst of false transitions on every press, and a crowd generates presses far faster and messier than a lab test. We implemented debouncing in firmware so that one physical press registers as exactly one event, and structured the input loop so that simultaneous presses across the ring are each handled on their own rather than colliding. When nine buttons can be hit at once by nine different hands, the software can't assume they'll arrive politely one at a time.
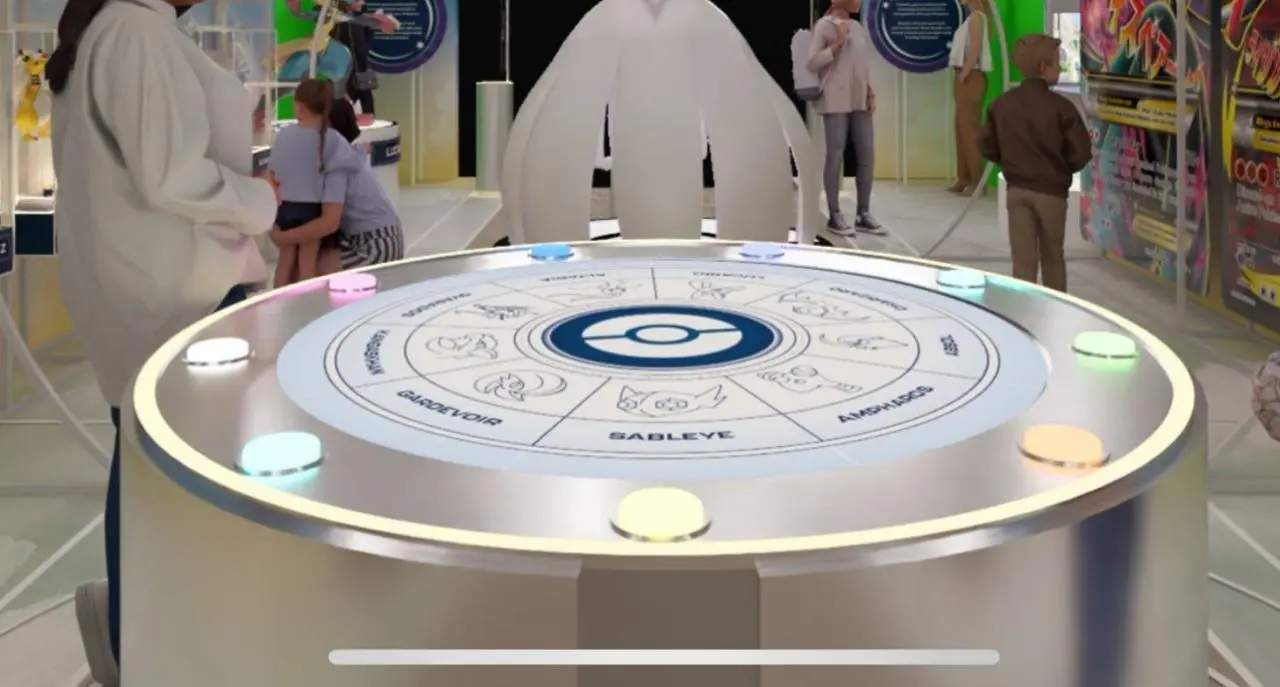
Each button owns a lighting state and a sound cue. On a valid press, the firmware drives that button's own RGB illumination, lights the corresponding overhead panel, and fires the matching audio clip — and it treats those three as one synchronized response, not three loosely-timed events. The synchronization is the part visitors feel without being able to name it: if the light and the sound drift apart even slightly, the whole thing reads as cheap. Keeping the panel and the audio locked to the same trigger, with playback latency low enough to feel instantaneous, is where most of the firmware care went. We handled the audio through a powered speaker driven off the Pi's output, with the clips pre-loaded locally so nothing depends on a stream or a network fetch at the moment of the press.
That last point is the design spine of the whole build: it is fully standalone and offline. There is no cloud service, no app, no network the exhibition's Wi-Fi could drop and take the experience down with it. The installation runs on mains power, boots directly into the running application when it's switched on, and needs no login, no dashboard, and no operator. We deliberately kept connectivity out — a show-floor piece that phones home is a show-floor piece that fails the moment the venue network hiccups. Everything the installation needs to do its job lives on the device. (For projects that genuinely need remote monitoring or connected features, that's a different architecture; this one was intentionally simpler, because simpler is what survives a public deployment.) The firmware and embedded control work here is the same discipline behind our broader embedded and electronics work — the difference is only in what's wired to the other end of the GPIO.
The production reality
The electronics are half the story. The other half is that a control board on a bench is not an exhibition attraction — someone has to build the physical thing the electronics live inside, and make it survive shipping and a show floor. We fabricated the illuminated overhead panels, built the wiring harness that connects them back to the pedestal, and assembled the electronics package inside the pedestal itself.
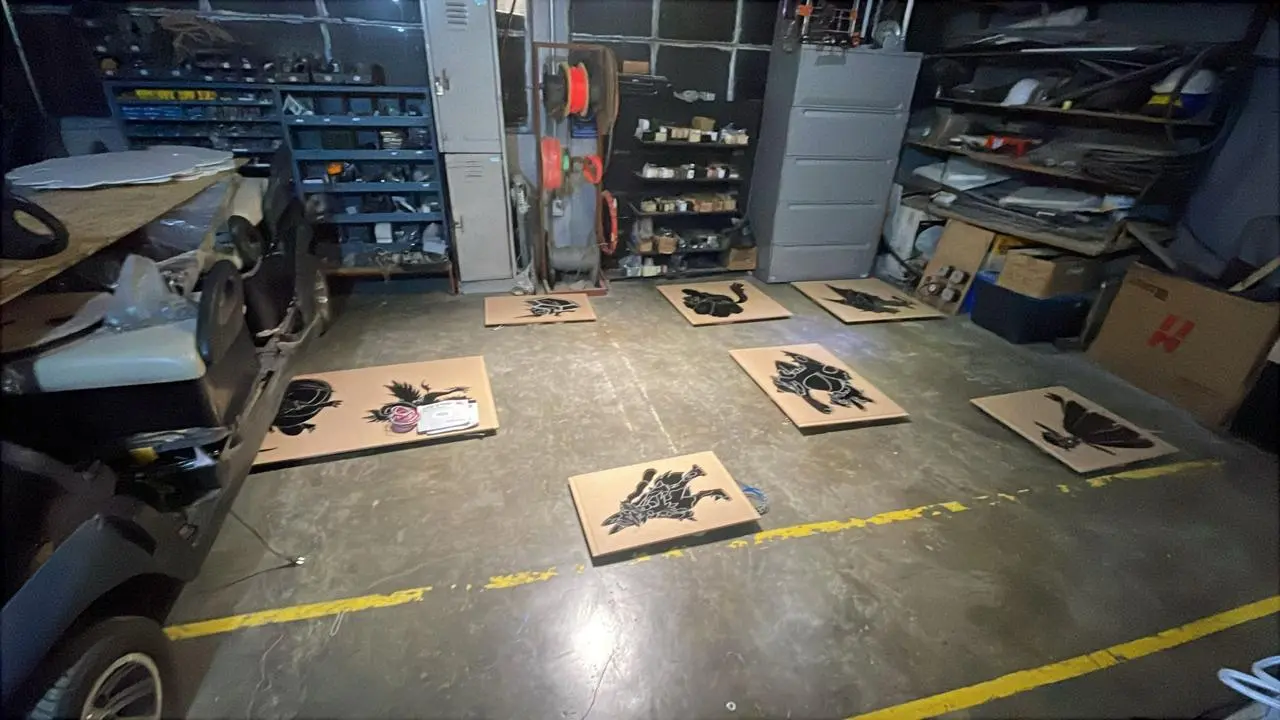
The overhead panels were the most involved piece of fabrication. Each one is a backlit, edge-lit panel with a bright outline that reads clearly from across a busy hall, wired individually so the controller can address it on its own. We prepped them in the workshop, ran the harness so each panel's power and control lines route cleanly back to the Pi, and bench-tested the entire input-to-output chain before anything shipped — pressing every button, confirming the right panel lit and the right clip played, and hammering the ring to shake out timing problems while they were still cheap to fix.
Then we installed it on site. Commissioning a piece like this at the venue is its own task: mounting the overhead panels to the rigging, running and dressing the cabling, powering up, and walking the full set of buttons in the actual space to confirm the installation behaves the same on the floor as it did on the bench. This was a single, purpose-built unit — not a production run — but it was fully built and deployed end to end by us, from the control firmware to the panels overhead to the moment it was switched on for the public. That span, from the Raspberry Pi engineers writing the input logic to the people mounting panels on a truss, is deliberately the same team.
The outcome
On the floor, the installation did the one thing it was built to do: it made people stop and take part. Visitors walked up, pressed a button, got an immediate light-and-sound response overhead, and pressed the next one — exactly the pull the concept was after. It ran as an unattended attraction through the show, holding up to continuous public use without an operator managing it.
The engagement with Hector reflected that result. The project began on Upwork and earned a five-star rating, and the working relationship continued beyond the platform into further scope — the kind of repeat engagement that tends to follow work that actually performed once it left our hands.

What this proves
This wasn't a firmware task handed off to someone else to package. We took an interactive concept and delivered the working object end to end:
- Embedded control logic — the Raspberry Pi firmware reading the button matrix and driving the whole experience
- Lighting and audio synchronization — every press mapped to its panel and sound cue as one locked response
- Fabricated panels — the illuminated overhead panels and wiring harness built in-house
- On-site install — mounting, cabling, and commissioning the piece live at the venue
That end-to-end span, done for one unit or many, is the thing off-the-shelf gear and code-only vendors can't offer. For interactive installations, it's the whole job.
Have an Interactive Installation Idea?
Whether it's a show-floor attraction, a custom control system, or a fully fabricated interactive piece, DigitalMonk can take it from concept to a working installation.